Mal,
I dont know what to say execept we know it will be a very nice straight rust free car when you are done.. hang in there.
As for the radiator opening, it looks like the same angled shape as an early alpine, i'll check the tiger and see if its the same, but i thought i recall the Tiger having a larger opening... have a look at the pics in the link, bit hard to see though:
http://rides.webshots.com/photo/2675992 ... 2410TXxJFQ
In for a penny
-
michael-king
- Posts: 438
- Joined: Thu Jun 21, 2007 8:35 am
- Location: Melbourne Australia
- Contact:
It could well be of an early alpine. The front has been off before. The original may have been damaged or to badly rusted. The horn holes are also different in shape to what I have seen.As for the radiator opening, it looks like the same angled shape as an early alpine, i'll check the tiger and see if its the same, but i thought i recall the Tiger having a larger opening... have a look at the pics in the link, bit hard to see though:
Mal
 [/img]
 [/img]
front panel
Hi my tiger is a mk1A and it has the same rad panel as yours and here is a pic i found on the web it seams to be the same as yours if you look close enough
regards paul
ps great job
sorry dont know how to do it try this http://rides.webshots.com/album/101683030EClDiQ
regards paul
ps great job
sorry dont know how to do it try this http://rides.webshots.com/album/101683030EClDiQ
 [/img]
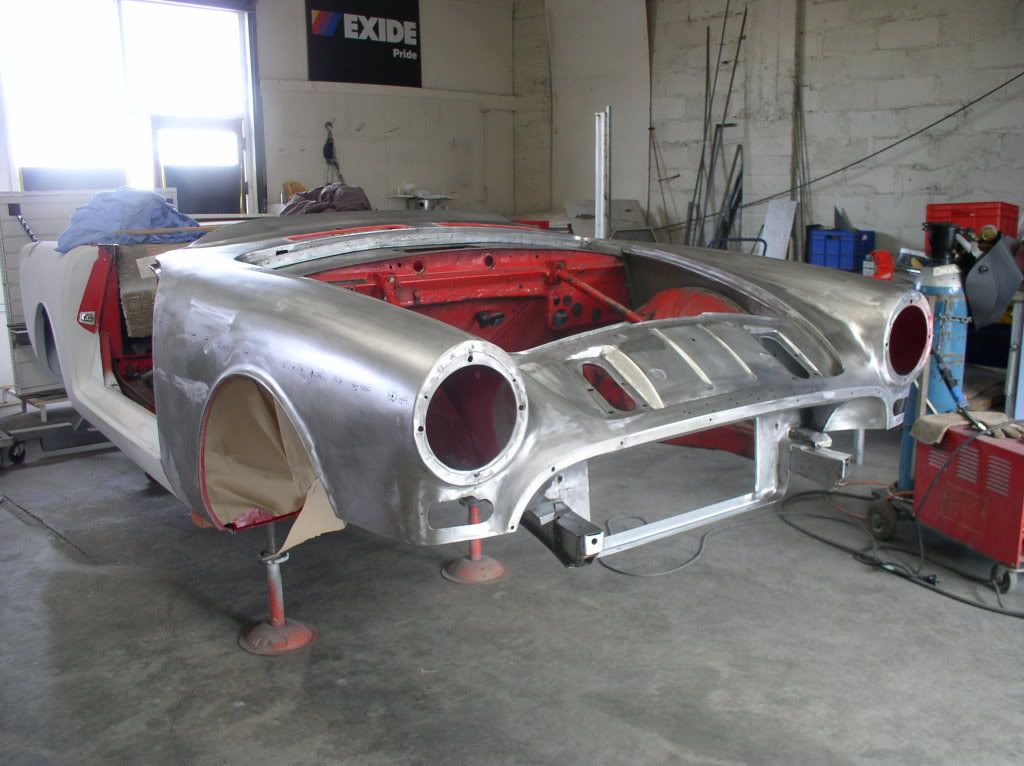
A couple of update pic's. He is going to shoot that with etching primer tomorrow. I thought I would get these pics up of it, in the BARE
Thanks for the link paul. As you can see we decided to open up the radiator opening up as much as possible to get maximum air through.
Cheers Mal.
-
michael-king
- Posts: 438
- Joined: Thu Jun 21, 2007 8:35 am
- Location: Melbourne Australia
- Contact:
Mal,
The car is looking really nice.. straight panels and nice straight rails. Make sure yor renforce the captive nuts where the bumpers mount, they are a thin bit of metal and quite weak.. make a C section cap to go over the top and brace that area.. youd be surprised how thin the metal is on that face.
Are you gogin to paint the underside the same as the top.. always so nice when its all matching.. or at least paint the wheel wells body colour.
Michael King
63 Alpine SII - 65 Alpine SIVGT
65 Tiger MKI - 66 Tiger MKIA

63 Alpine SII - 65 Alpine SIVGT
65 Tiger MKI - 66 Tiger MKIA
Thanks guys.
The underside will be body colour.
Robin. The front valance needs some work to get it to fit properly.
We are looking at the chin spoilers thet were on the development MKII's to help strengthen the valance and push air up through the radiator.
There is still some work needed on the rear of the car. The boot skin may need to come off. There is some rust starting on the seam, from outer skin to frame. Then we need to sort out the leaf spring perchs and panhan rod supports. The floor pan has been patched before, but seems ok, so hopefully just a tidy up.
Cheers Mal.
Michael, He has beefed up the bumper mounts. He has been using a heavier gauge metal in most places to strenghthen the car. He wants to connect the chassis rails hidden behind the valanve to give the car more strength, instead of the bumper being the main cross member.Make sure yor renforce the captive nuts where the bumpers mount, they are a thin bit of metal and quite weak.. make a C section cap to go over the top and brace that area.. youd be surprised how thin the metal is on that face.
The underside will be body colour.
Robin. The front valance needs some work to get it to fit properly.
We are looking at the chin spoilers thet were on the development MKII's to help strengthen the valance and push air up through the radiator.
There is still some work needed on the rear of the car. The boot skin may need to come off. There is some rust starting on the seam, from outer skin to frame. Then we need to sort out the leaf spring perchs and panhan rod supports. The floor pan has been patched before, but seems ok, so hopefully just a tidy up.
Cheers Mal.
Are these areas going to be strengthened as well? I think there were articles somewhere on strengthening these areas (At least the panhard rod anyway).Mal wrote:Then we need to sort out the leaf spring perchs and panhan rod supports.
Regards, Robin.
Robin O'Dell
Tiger MK 1a
ENJOYING THE EXPERIENCE AS DAD WOULD HAVE
Tiger MK 1a
ENJOYING THE EXPERIENCE AS DAD WOULD HAVE
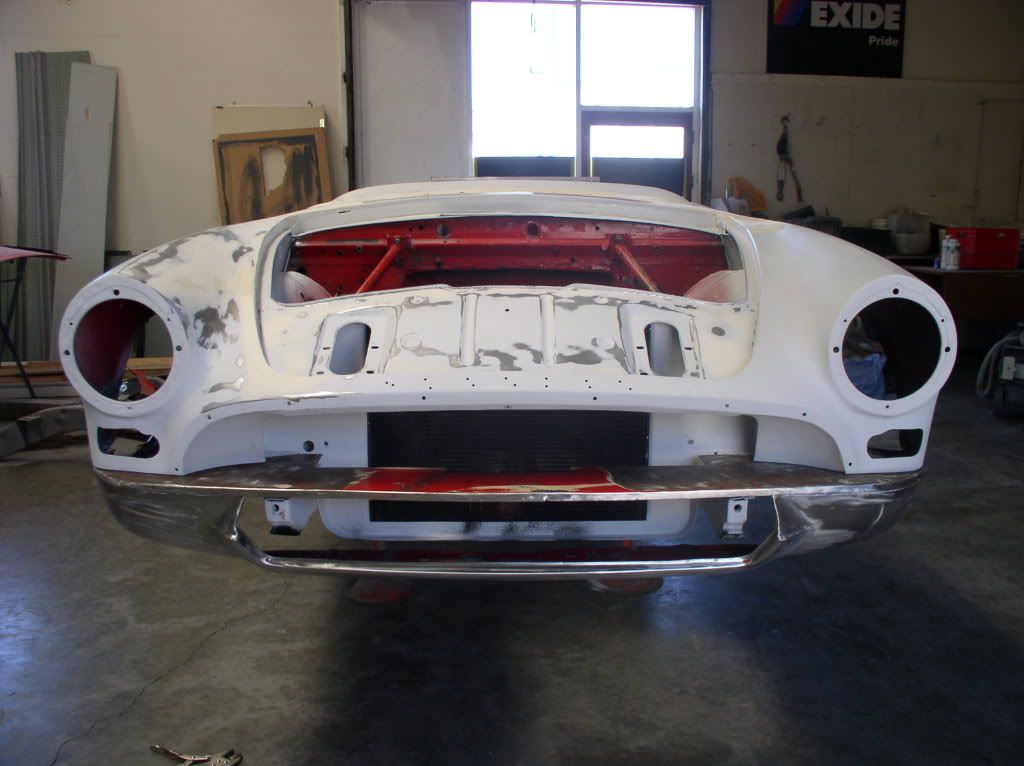
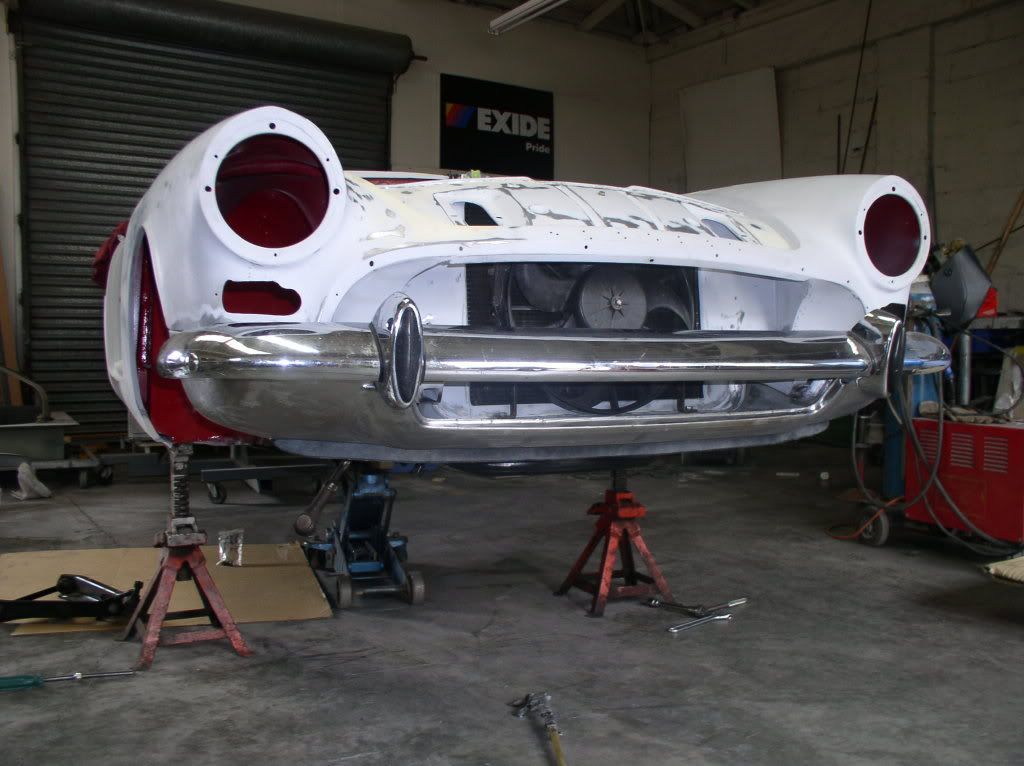
Front valance on and opened up. Small spoiler as well.
Whats the verdict, good-bad
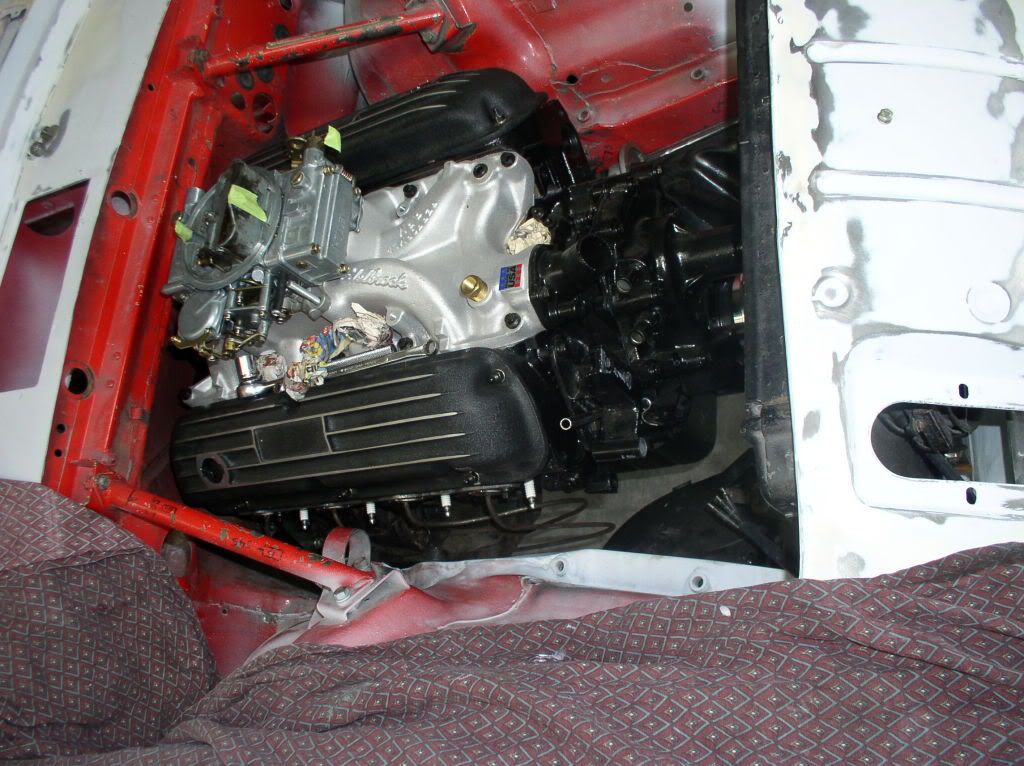
Trial fit of the engine to check my header desgin and bonnet clearance. With the rpm intake there is none with the air cleaner on.
Whats the verdict, good-bad
Trial fit of the engine to check my header desgin and bonnet clearance. With the rpm intake there is none with the air cleaner on.
Last edited by Mal on Mon Apr 02, 2012 8:38 am, edited 1 time in total.
I like it and when the car is on the ground I imagine you won't be able to see it either so it will look standard.
I'd say that when it's finished, your Tiger is going to look brilliant.
You need to wrap some masking tape around that dip stick hole imo. Sod's law says that something will drop in it given half a chance.
I'd say that when it's finished, your Tiger is going to look brilliant.
You need to wrap some masking tape around that dip stick hole imo. Sod's law says that something will drop in it given half a chance.
Hi Mal,
The front valance has come up very nicely. Can't wait to see the finished product. How long until it is complete? In regards to your clearance issue, you may have to get the intake manifold machined where the carby sits. A local member installed an RPM air gap manifold and had to machine it to fit. I think approximately 1/2" was removed and I think the air gap's are higher again than the RPM. What air cleaner are you using?
Regards, Robin.
Robin O'Dell
Tiger MK 1a
ENJOYING THE EXPERIENCE AS DAD WOULD HAVE
Tiger MK 1a
ENJOYING THE EXPERIENCE AS DAD WOULD HAVE
-
garyv8tiger
- Posts: 650
- Joined: Sun Dec 30, 2007 10:57 am
metal work is spot on ,far better than we get in the uk,i have an rpm airgap on a 302 and it fits under the bonnet with a stock air filtergtsmrt wrote:Hi Mal,
The front valance has come up very nicely. Can't wait to see the finished product. How long until it is complete? In regards to your clearance issue, you may have to get the intake manifold machined where the carby sits. A local member installed an RPM air gap manifold and had to machine it to fit. I think approximately 1/2" was removed and I think the air gap's are higher again than the RPM. What air cleaner are you using?
Regards, Robin.