The oxford rack had the same dimensions and mounts as a Midget rack. The difference is the oxford is a rear steer and the midget a front steer so no a LHD oxford rack would not bolt straight into a tiger.Do I take it then if you were to get a LHD morris oxford rack it would bolt straight in.
In for a penny
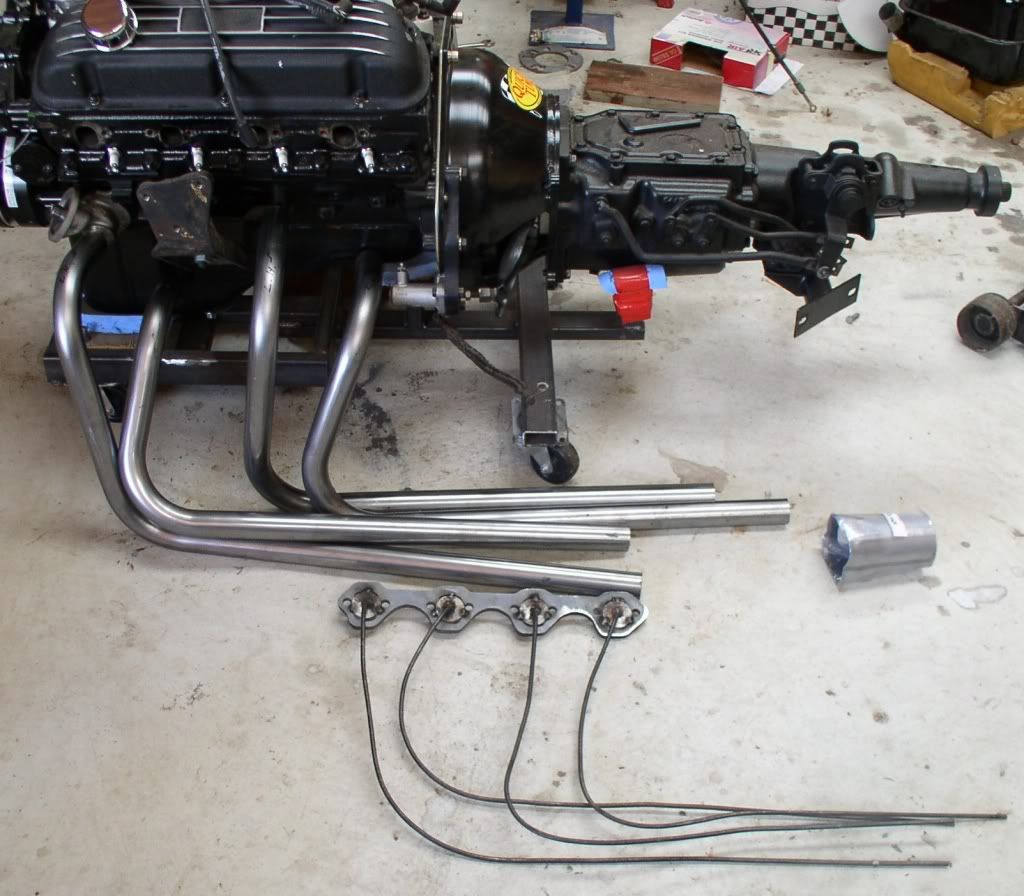
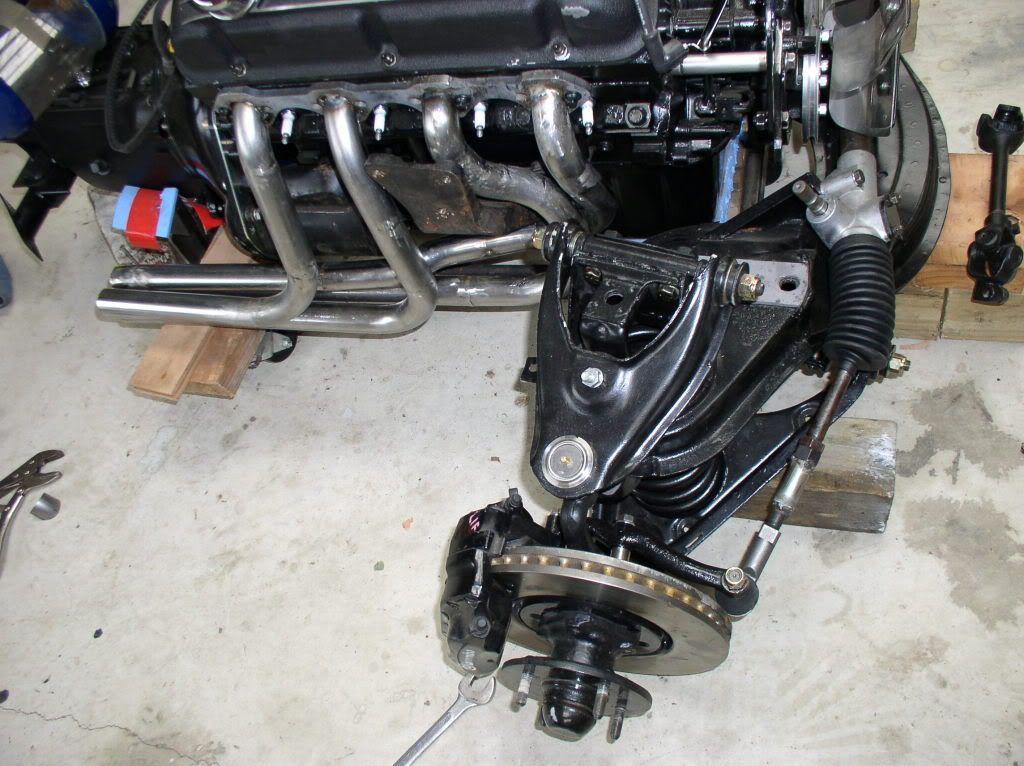
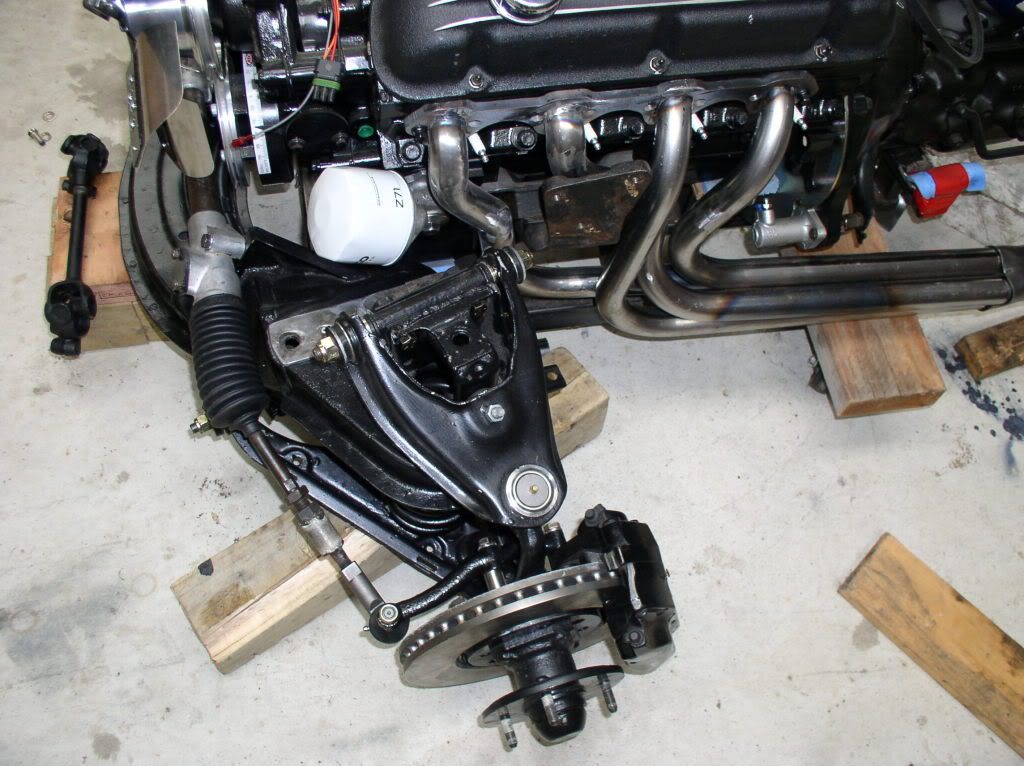
I have been building the headers this weekend. Raining all day sat. I could not use the headers that are available because of the GT40P heads. I made up some patterns from 6mm mild steel rod and sent them away to be copied and mandrel bent out of 1 1/2" exhaust tube. They could not bend them to the exact shape, but it is better than starting with a pile of U bends, and cheaper.
The pattern and the bent up tubes.
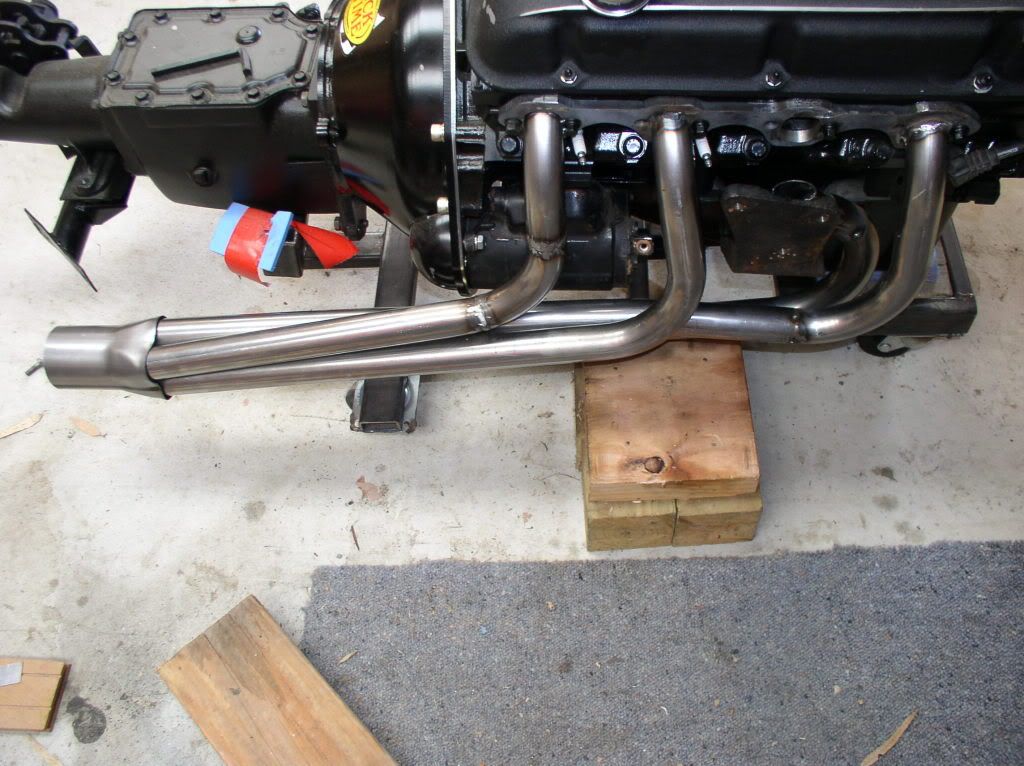
The other side nearly done. I need an exhaust donut to finish the tube behind the engine mount.
The pattern and the bent up tubes.
The other side nearly done. I need an exhaust donut to finish the tube behind the engine mount.

A few update pic's
Looks a bit like Norman Gunston, but
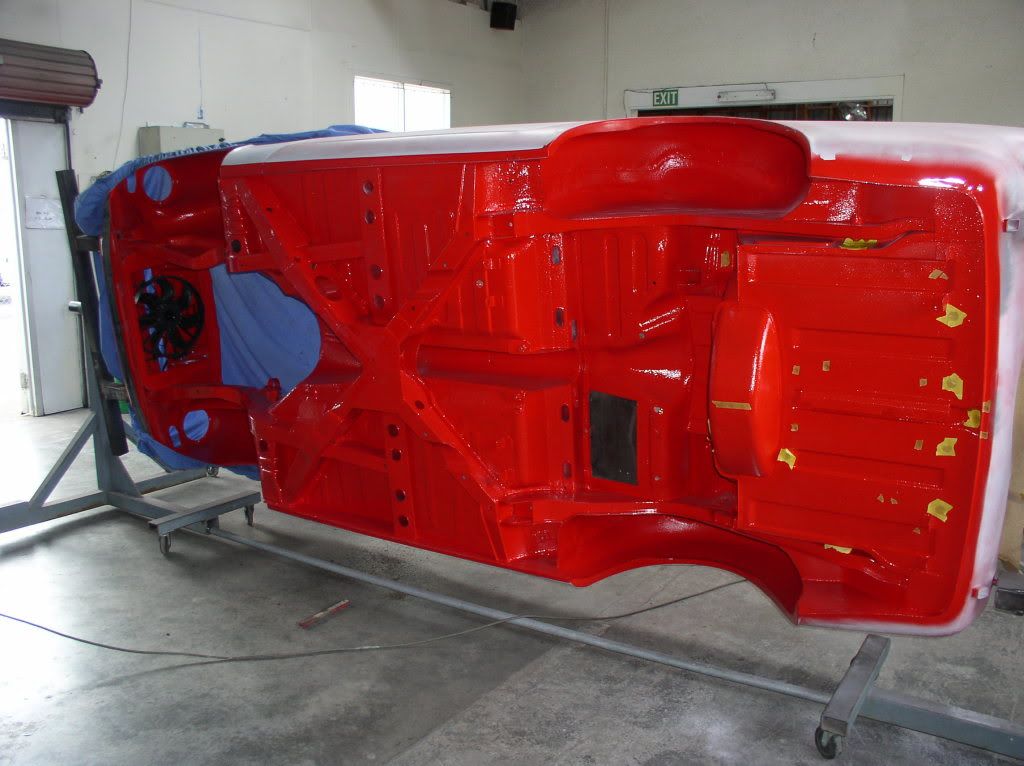
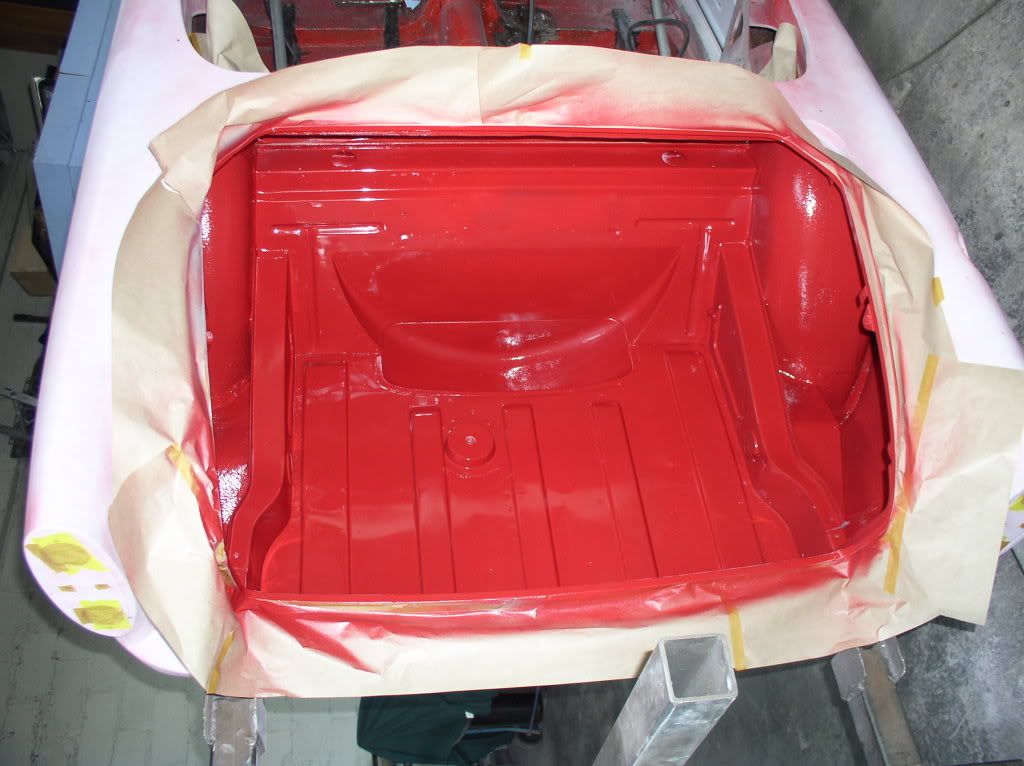
First coat of paint in the boot. Not the correct colour but we have the seam sealer to go on before the correct finish coat.
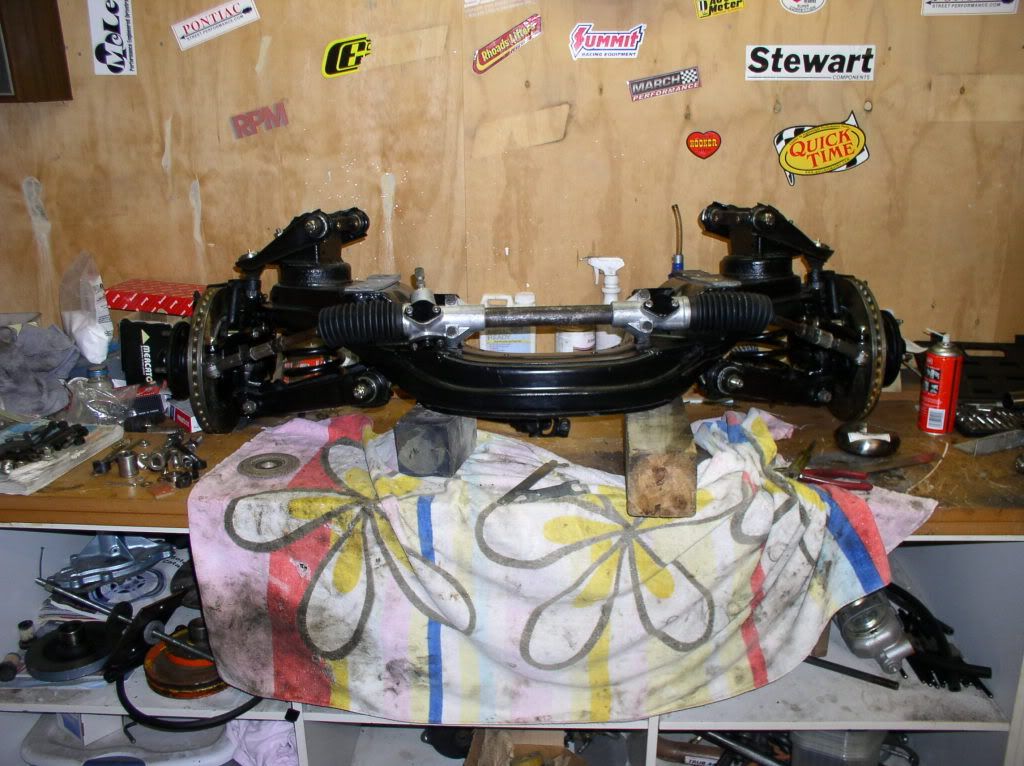
The front springs are in and I made up some extensions for the steering so we can at least manoeuvre the car around the workshop.
Looks a bit like Norman Gunston, but
First coat of paint in the boot. Not the correct colour but we have the seam sealer to go on before the correct finish coat.
The front springs are in and I made up some extensions for the steering so we can at least manoeuvre the car around the workshop.
Brad, I got the plans from here. There are a lot more plans on line now to choose from. Some use hydraulics to lift and lower the car. We use the mechanics hoist next door.
Cheers
http://www.harwoodperformance.bizland.c ... ial_20.htm
Cheers
http://www.harwoodperformance.bizland.c ... ial_20.htm
-
garyv8tiger
- Posts: 650
- Joined: Sun Dec 30, 2007 10:57 am
-
H, Sunny 65
- Posts: 110
- Joined: Mon Mar 10, 2008 11:40 pm
Harry & GaryH, Sunny 65 wrote:Mal
I gave my 90 deg adapter to a machinist, he took 3mm off the face, and re gut the groove for the "O" ring, then opend up the oil hole in the bolt, it now fit's behind the headers no problem.
Harry
The header tube clears the adapter but I can't see me getting a oil filter on in the facing down and rearwards position. I don't think I can face it forwards like I have it there as the chassis rail will be in the way.
What way do you have your filter facing
Cheers
Mal,
Have a look at the 10th post (for a full-size filter) on the Small Oil Filter thread in Tech Tips.
A full-size filter can then be mounted upside down in the original location in front of the LH cylinder head. The TRD-1028 with vertical ports is preferable.
http://www.summitracing.com/parts/TRD-1028/?rtype=10
A flattish steel plate with 5 holes (3 for TRD-1028 and 2 to match the cylinder head) is all that is required for mounting.
The block adapter (TRD-1413) fitted with my US Tiger headers without any problems.
If preferred, you can use compression fittings with stainless braided hose instead of push-on 1/2 inch NPT barbs.
Last edited by V8 burble on Sun Mar 25, 2012 6:56 am, edited 1 time in total.