Post your questions or information about Tiger restorations
-
Brad1380
- Posts: 547
- Joined: Wed Apr 27, 2011 1:38 pm
Post
by Brad1380 » Tue Jun 18, 2013 9:03 pm
Thats exacly what i intend to do, i have some spray gear just for wax left over from the Triumph.
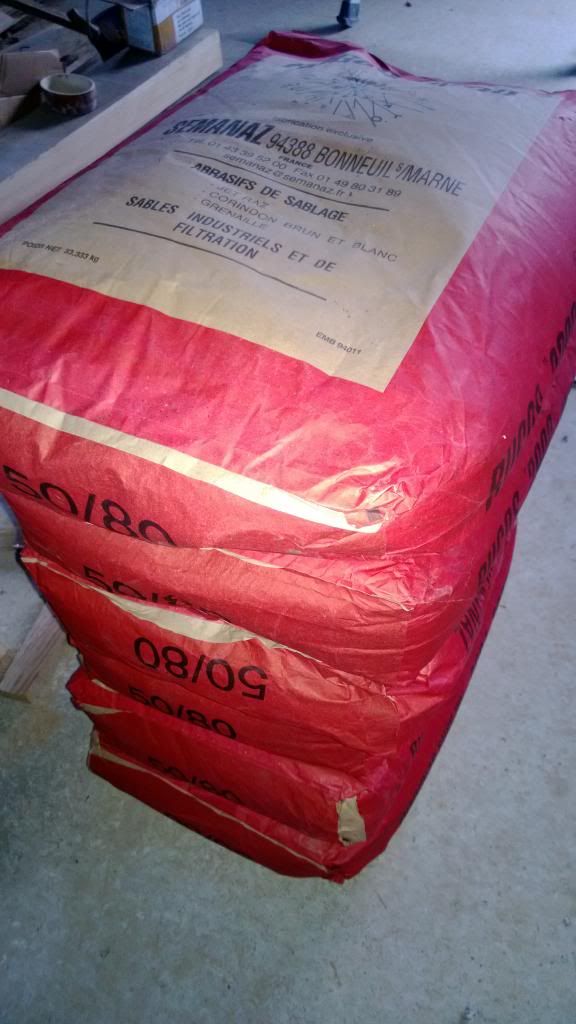
Been asking a few neighbours & friends where i can get shot blast media, anyway first thing this morning a mate of a mate turned up with 6 sacks! yet to pay for them as well

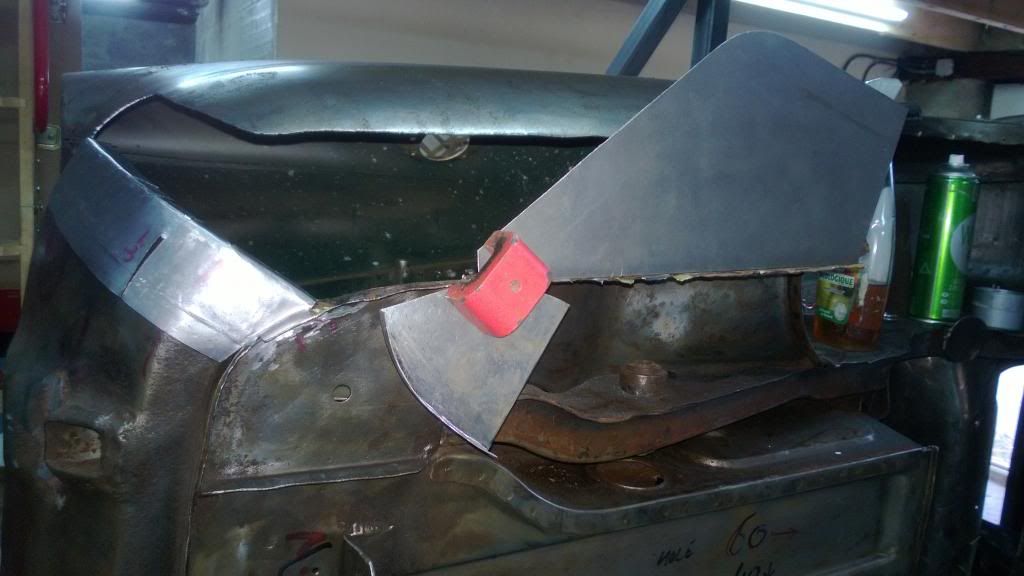
Been making some repair panels, the one for the rear valance is a bit awkward with the compound curves, this is my first attempt, i think i will need several more tries. The other ones are not in there intended positions before anyone asks.
1966 Sunbeam Tiger Mk1
-
Brad1380
- Posts: 547
- Joined: Wed Apr 27, 2011 1:38 pm
Post
by Brad1380 » Fri Jun 21, 2013 9:02 am
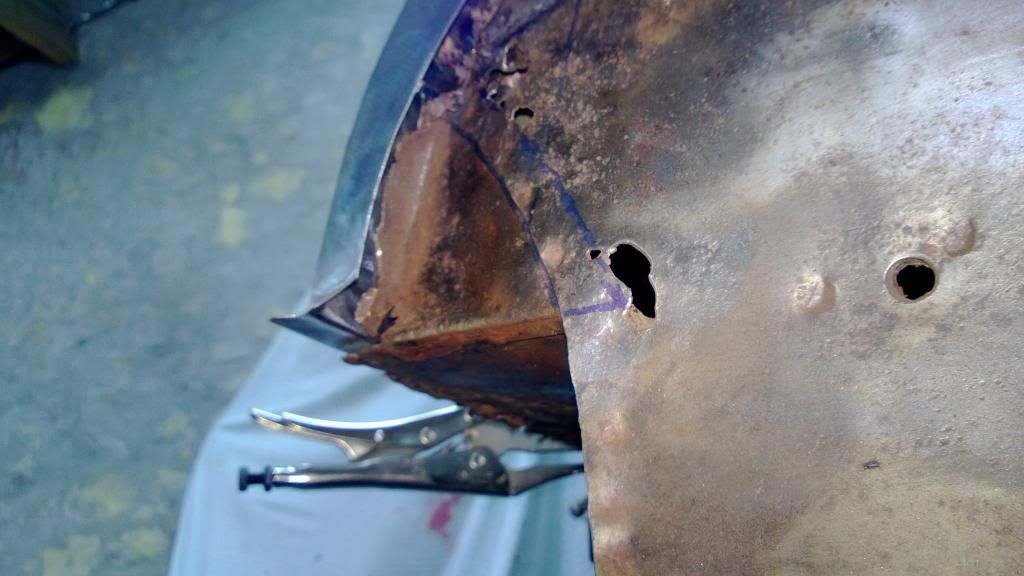
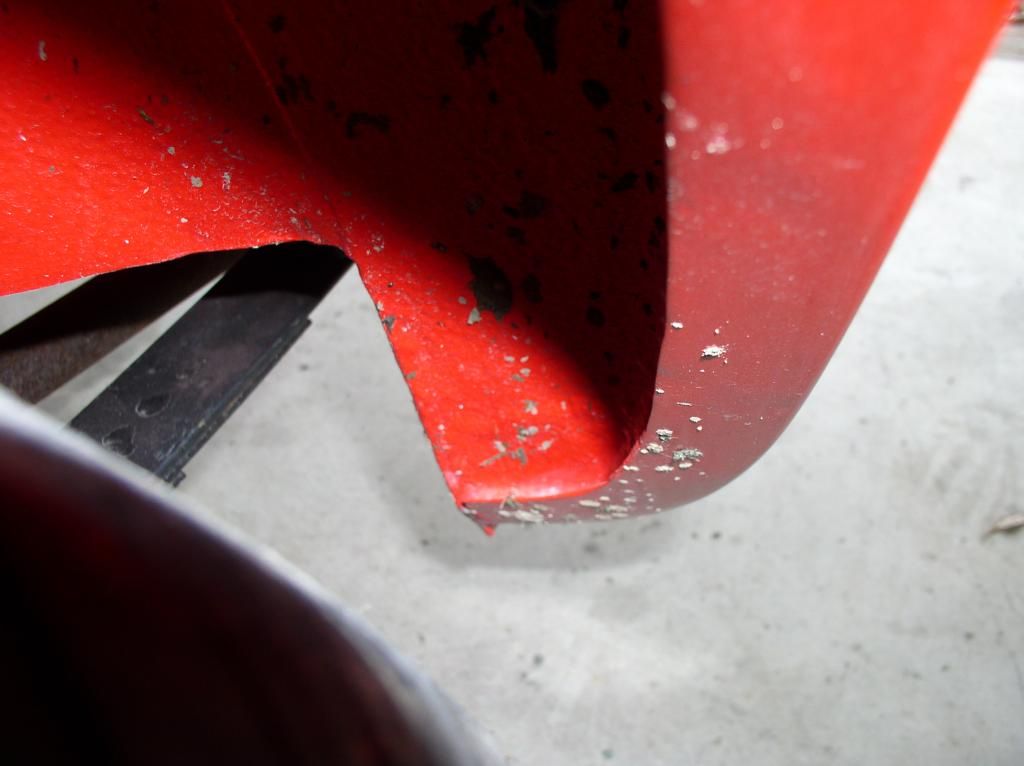
Anyone assist with this, when i trial fit the wing repair section i end up with a 1 inch gap when compared to the original which ended up flush, bearing in mind that the original wing lips have been hammered which one is correct?
1966 Sunbeam Tiger Mk1
-
Brad1380
- Posts: 547
- Joined: Wed Apr 27, 2011 1:38 pm
Post
by Brad1380 » Fri Jun 21, 2013 12:07 pm
Heres a couple of shots from a different angle so you can see the difference.
The old ones were flush with the finisher section.
The new repair sections are about an inch out, though it looks better for water drainage.

1966 Sunbeam Tiger Mk1
-
martin172
- Posts: 1022
- Joined: Thu Jul 22, 2010 2:14 pm
Post
by martin172 » Fri Jun 21, 2013 12:44 pm
The original one looks like it has been beaten up against the triangular panel.
If it was pulled out to around a 45 degree angle in relation to the floor, I'd say it would be about right.
On mine, the gap from the top of the lip at its end to the panel is around 1/2 an inch...if that makes sense.
This club has more than it's fair share of Tiger panel beaters in it's ranks.
Come on lads, help Brad out. You must be able to help better than me.
I've only been here 5 minutes.
Lame rant over.

-
Brad1380
- Posts: 547
- Joined: Wed Apr 27, 2011 1:38 pm
Post
by Brad1380 » Fri Jun 21, 2013 4:59 pm
martin172 wrote:
This club has more than it's fair share of Tiger panel beaters in it's ranks.
Come on lads, help Brad out. You must be able to help better than me.
I've only been here 5 minutes.
Not the most frequented forum & i think some are shy in case the Tiger police come along, plenty of lurkers though.
1966 Sunbeam Tiger Mk1
-
Ash
- Posts: 178
- Joined: Sat Aug 15, 2009 9:47 am
- Location: Nottingham
Post
by Ash » Fri Jun 21, 2013 5:33 pm
Just measured my rear wings at half inch.
-
Brad1380
- Posts: 547
- Joined: Wed Apr 27, 2011 1:38 pm
Post
by Brad1380 » Fri Jun 21, 2013 5:40 pm
Thanks Lads,
i'll have a jiggery poke at it over the weekend & see if i can reduce the gap a bit, run out of MIG wire so won't be welding for a few days.
Got the shot blaster up & running after rewiring the compressor pressure sensitive switch which had been bypassed? anyway went OK for a short while until the hose valve gave out, no fun shot blasting with a live end you can't shut off when stood on a step ladder, still the ceilings clean now

1966 Sunbeam Tiger Mk1
-
Mal
- Posts: 672
- Joined: Sat Aug 02, 2008 5:39 am
- Location: NZ
Post
by Mal » Fri Jun 21, 2013 10:01 pm
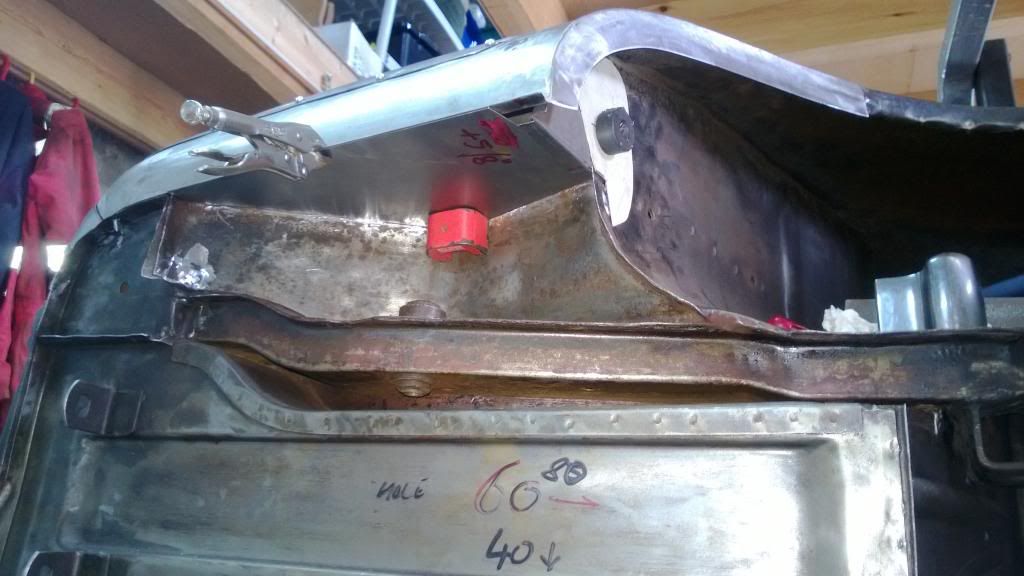
Brad, here's a pic of mine.
-
Brad1380
- Posts: 547
- Joined: Wed Apr 27, 2011 1:38 pm
Post
by Brad1380 » Sat Jun 22, 2013 9:33 am
Thanks Mal,
hope your doors are staying shut nowadays & don't go getting it too dirty now.
1966 Sunbeam Tiger Mk1
-
Brad1380
- Posts: 547
- Joined: Wed Apr 27, 2011 1:38 pm
Post
by Brad1380 » Sun Jun 23, 2013 7:45 pm
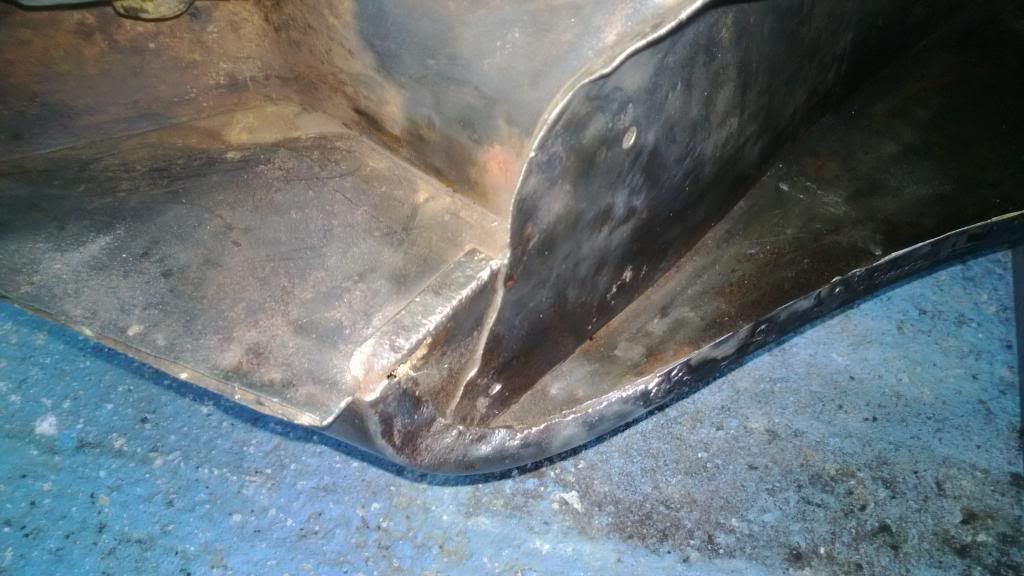
Managed to get the gap to 5/8th's so happy with that, need to redo the repair section i made before as it's now too short & re-instate the inner wing so theres something to weld too.
1966 Sunbeam Tiger Mk1
-
meadowhog
- Posts: 392
- Joined: Fri Dec 16, 2011 1:50 pm
- Location: South Bucks
Post
by meadowhog » Mon Jun 24, 2013 9:48 pm
Brad, just want to say, havent seen many replies to your posts, but I love seeing them and bloody good stuff going on there, keep it up. You're making it look so easy I almost want to rip mine apart and start again.............almost.
-
martin172
- Posts: 1022
- Joined: Thu Jul 22, 2010 2:14 pm
Post
by martin172 » Mon Jun 24, 2013 11:06 pm
meadowhog wrote:Brad, just want to say, havent seen many replies to your posts, but I love seeing them and bloody good stuff going on there, keep it up. You're making it look so easy I almost want to rip mine apart and start again.............almost.
You're a sick, sick man!
-
Brad1380
- Posts: 547
- Joined: Wed Apr 27, 2011 1:38 pm
Post
by Brad1380 » Tue Jun 25, 2013 9:18 pm
it's never easy or quick. Glad you are enjoying the progess though, your one of the few to say, so it's appriciated.
One question, the join line from the bottom of the rear light, down past the back of the rear wing & the rear valance, does this reamain visable or is it filled in?
1966 Sunbeam Tiger Mk1
-
martin172
- Posts: 1022
- Joined: Thu Jul 22, 2010 2:14 pm
Post
by martin172 » Tue Jun 25, 2013 10:28 pm
For the sake of originality I would say visible like this one..
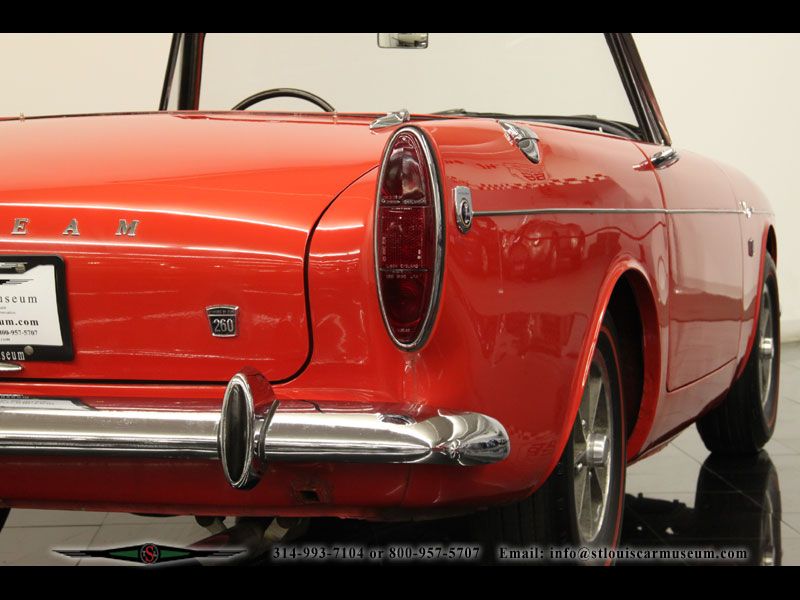
..but looking at pictures, there as many filled in as not.
-
Tom_HRO260
- Posts: 91
- Joined: Fri May 14, 2010 5:25 am
- Location: Melbourne, Australia
Post
by Tom_HRO260 » Wed Jun 26, 2013 12:47 am
Brad1380 wrote:
One question, the join line from the bottom of the rear light, down past the back of the rear wing & the rear valance, does this reamain visable or is it filled in?
Hi Brad - I'm no Tiger Cop but on mine and on my Alpine the seam is visible so I'm siding with Martin.
On a curious side note, did you go the full thrill seeker route and do your ceiling sand blasting with live end standing on a metal ladder?!!
Oh, and seconding comments re the progress - great work!
Cheers,
Tom